|
|
|||||||||||||||||||||||||||||||||||||||||||||||||||||||||||||||||

| Beader's Info Page | Bead Wire | Birthstones |
| Construction | Crimping | Earrings |
| Jewelry Lengths | Memory Wire | Rules To Live By |
| Seed Beads Per Gram | Supply List | Tools |
Colorful Memory Wire Bracelets |
|
|
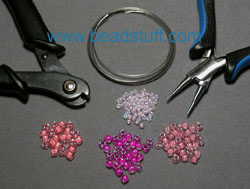
MATERIALS
|
If you've seen us at a show, you know
we have lots of these bracelets made up as samples. We love all the
textures and colors you can combine into a beautiful piece of jewelry
using these simple materials. Whether you make a bracelet or a
necklace the process is the same. I have some additional bracelets
pictured below. |
|
TOOLS
|
If you want to view the supplies for making this memory wire project, I've included links to get you to the pages that contain the materials. Each link opens a new window. |
WARNING!!! Don't use your good flush cutter on Memory wire!
Memory wire is very hard, hard enough to damage the cutting blade of most cutters so they won't cut other things. I have three nicked cutters because I keep trying to test the limitations of different flush cutters. Trust me when I say "memory wire is really hard stuff." It's true! A memory wire cutter is a good investment. They are designed to cut hard wire and it won't dull or nick like your flush cutter will. It can also be used to cut heavy silver or copper wire easily. It cuts the end of the wire square so it's less likely to poke you and it shears the wire with much less pressure so you save your hands.
 |
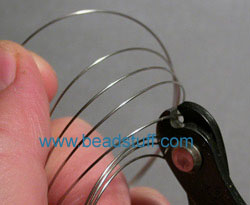 |
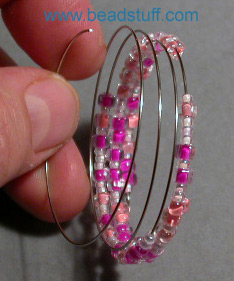
| Begin by counting off any
number of loops that you want. Cut the wire off your supply using
your memory wire cutter. We use 4 loops as shown here. I'm holding
the other end of the wire between my thumb and index finger. Try to
cut enough wire so the ends will overlap each other by an inch or
two after the end loops are formed, this gives your bracelets a fuller look.
We select a pre-made seed bead color mix or we mix 3 to 6 different beads to give us a fun mix of color and texture. Example: 5 Triangles mixed with 6/0 and 8/0 rounds, add some 4mm cubes and you will have fantastic textures. Pick colors that coordinate and experiment to find your favorite combinations. You will need about 3/4 of a 6" tube of seed beads to fill 4 loops of wire like we used here. |
|
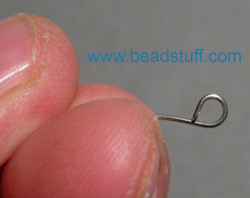
| Get a firm grip on the end of the wire. Trap it between your thumb and index finger. Use your round nose pliers to grip the wire at the end. Curl the wire and form a loop. Memory wire is very stiff. To make forming loops easier, stand up and hold your hands about waist level. You have greater strength this way and it makes forming the loops easier. |
|
|
|
Here's the completed loop on the end of the wire. Be sure your loop is completely closed so the beads can't escape. Notice that the loop is curled away from the center of the memory wire coil. This ensures the loops won't dig into your wrist. If the loop ends up twisted sideways, use a chain nose pliers to straighten it. |

|
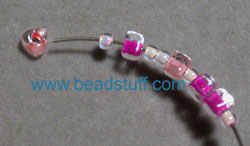
Begin stringing the beads on the memory wire. To ensure a consistent "random look" to your project, never string more than three of the same bead next to each other. By varying the color, size, and shape of the beads you use you can create fun & exciting color combinations. |
 |
|
|
Move the beads down the wire to the end where you formed the first loop. Continue adding beads until the wire is full to within 1/2 inch of the end. Use different sizes and shapes to get a textured, artistic, random look. You can also add larger accent beads if desired. Try combining Swarovski crystals with seed beads that are a similar color. You'll add big "bling factor" to your bracelet, but it's more economical than just using crystals alone. |
|
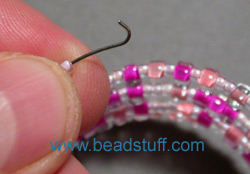
Use the round nose pliers to form a nice round loop on the final end. Turn the loop away from the center so the finished loop won't rub on your skin. |
 |
|
|
Finish the loop and make sure it is all the way closed so your beads can't escape from the end. If needed, you can use your chain nose pliers to straighten the loop if it is twisted sideways or off center. |
|
Here's a picture of the finished memory wire bracelet.
You might want to make two or three of these at the same time. Your friends are sure to want one when they see yours. This is a great way to fund your hobby! |
|

|
|
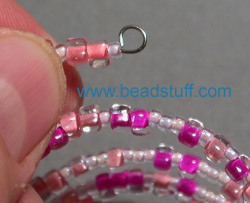
You can design small dangles using some head pins and a few extra beads. If you need help with this technique it is shown on the Earring page. There's a link to get there at the top of this page. |
| Attach your dangle to the loop you made at the end of your bracelet and your project has been dressed up. Put it on and be sure you let everyone know you made yourself. Enjoy! |
|
| When you make a memory wire necklace, using the neck size memory wire, be sure you allow a little extra wire so the ends will overlap each other when you put the necklace on your neck. This ensures a more comfortable fit. | |
| Feel free to print these instructions and share them with your friends. We require that you include our name and copyright information. Contact us prior to using this for classes or commercially, you need our permission. |
Copyright 1997-2009 BeadStuff "Everyone Needs A Few Good Beads!" Doug Larson PO Box 204013 Austin, TX 78720 512-836-5702 |
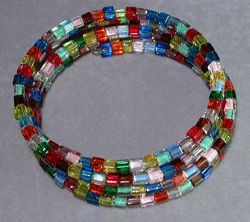
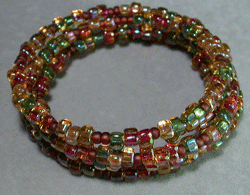
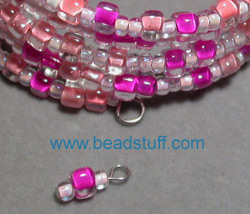
SAMPLE BRACELETSMost of these mixes can be found in our Japanese
Seed Beads. A few of these are made from beads we selected and mixed
so they are not available in a mixed tube. |
|
|
Blue Triangle Multi Mix |
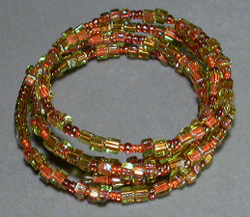
Citrus Splash Multi Mix |
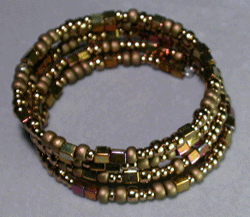
Bronze Multi Mix |
Colored Cube Mix |
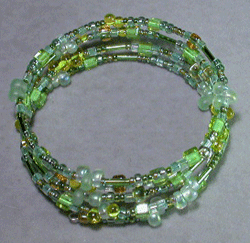
Mint Julep Multi Mix |
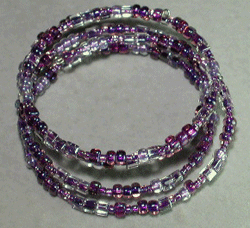
Grape Nehi Multi Mix |
Victorian Romance Multi Mix |

Triangle Multi Mix |
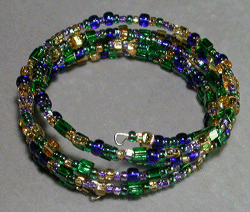
Mardi Gras Party Multi Mix |
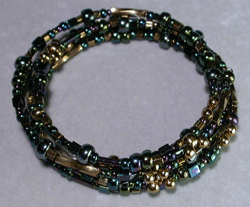
Metallic Rain Multi Mix |


If you have any tips or tricks, send us an email with your favorites. We'll be glad to publish your ideas here on Beadstuff.com!
Tall Pam says "It's Easy and Safe to order online. Orders are processed on a Secure Server!
To place your order, browse our product pages. Enter the quantity you want to order, and click the ADD button to add the items to your order. After completing your selections, proceed to the Checkout. Type special instructions in the comments area available during checkout. We appreciate your business! For additional information, you can contact us with email to tallpam@beadstuff.com We accept VISA, MC, AMEX, Discover, Check, or Money Order as payment.
We carry a great selection of beads including: Swarovski crystals, glass beads from the Czech Republic, Japanese Miyuki seed beads, turquoise and coral, gemstone beads, gold fill, copper, sterling silver and plated findings, Beadalon and Soft Flex bead wire, and a selection of jewelry tools and beading supplies. Visit the Contact Us link for more information.
Copyright 1997-2017 BeadStuff - All Rights Reserved